
How to Repair a Pipe with a Repair Sleeve
A leaking pipe can turn a quiet utility room into a wet, costly problem. A repair sleeve may provide a practical way to seal certain localized leaks without replacing an entire pipe section. Small leaks matter. But the right repair depends on the pipe’s material, diameter, condition, and operating pressure.
The scale of infrastructure needs makes durable repairs important. The U.S. Environmental Protection Agency’s 2023 report, the Seventh Drinking Water Infrastructure Needs Survey and Assessment, estimates that drinking water systems will need $625 billion in investment over 20 years. This figure covers broad infrastructure needs; it does not mean a sleeve is suitable for every failure. Good sleeve pipe repair begins with careful inspection and the correct product. The line may need to be isolated and depressurized, subject to system requirements. The repairer should confirm the sleeve’s compatibility, measure the damaged area, and follow the manufacturer’s installation and torque instructions. Details matter.
This guide explains how to assess a pipe, select a repair sleeve, and fit it evenly over the leak. It also covers checks after installation, including watching for seepage when service is restored. A sleeve can be useful for a limited, compatible defect, but it cannot restore every badly corroded, cracked, or structurally weakened pipe. That distinction is easy to miss. When pipe condition or pressure limits are uncertain, consult a qualified plumbing or utility professional before proceeding.
Identifying the Pipe Type and Assessing the Damage
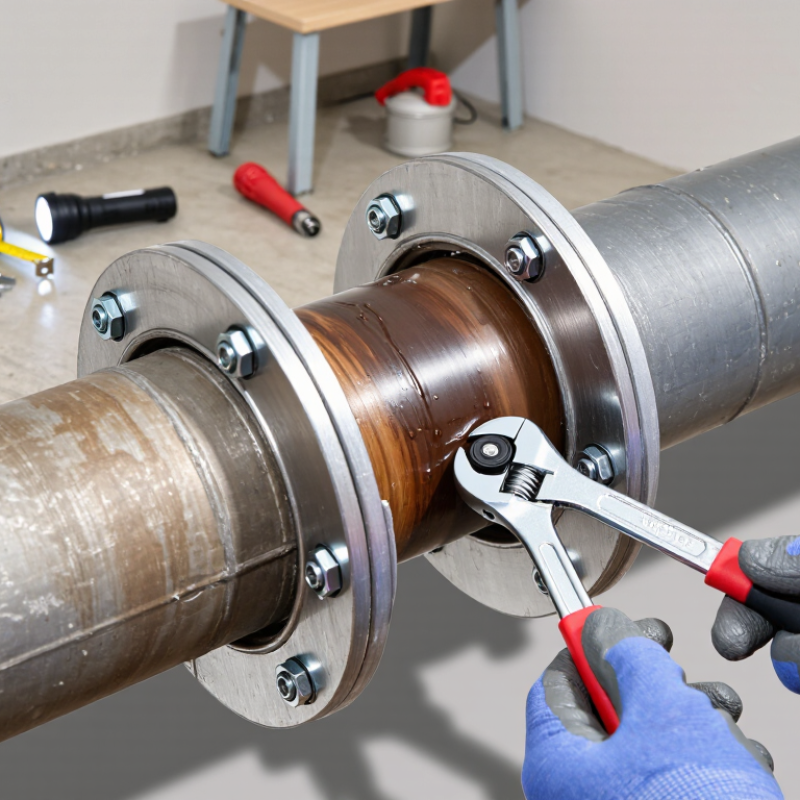
Before selecting a repair sleeve, identify the pipe material. Common water lines include copper, galvanized steel, PVC, CPVC, and PEX. Look for printed markings, visible color, and the pipe’s connection style; do not rely on color alone. A sleeve designed for one material may not fit or seal another. Check the pipe’s outside diameter and confirm that the sleeve is rated for the line’s pressure and intended use. Turn off the water and drain the section before inspecting it. Keep a towel nearby.
Now locate the damage carefully. Dry the pipe, then watch for a pinhole, a narrow split, or water escaping from a joint. These are not the same repair. A sleeve may suit a small, localized leak on a sound, straight section. It is usually a poor choice for a long crack, a failing joint, or metal weakened by broad corrosion. Look for flaking, deep pitting, bulges, and damp marks that extend beyond the visible drip. A quick glance can miss trouble. I would recheck the area after drying it, even if that feels overly cautious. If the damage is hidden, extensive, or hard to classify, have a qualified plumber assess the pipe before covering it.
| Pipe Type | Common Identification Clues | Damage to Assess | Repair Sleeve Considerations | When to Stop and Seek Professional Help |
|---|---|---|---|---|
| Copper | Rigid metallic pipe, typically reddish-brown; may have green or blue-green surface deposits. Common in domestic water systems. | Check for a pinhole, split, corrosion, or damage near a joint. Dry the area and inspect the full circumference for additional weak spots. | A clamp-style sleeve may be suitable for a small leak on a straight, accessible section if it is specifically rated for the pipe size, material, and service pressure. Follow the sleeve instructions. | Seek help if the pipe is badly corroded, the leak is near a joint or concealed fitting, or the damage extends beyond a small localized area. |
| PVC | Rigid plastic pipe, often white or gray, with solvent-cemented fittings. Printed markings may identify its size and pressure rating. | Look for a crack, split, impact damage, or a leaking joint. Check whether the pipe is under strain or poorly supported. | Use only a sleeve or repair coupling approved for the pipe material, diameter, and application. A clamp may be a temporary measure; permanent repairs may require cutting out the damaged section and installing a compatible coupling. | Get professional advice if the pipe is part of a pressurized, buried, or critical system, or if the crack is long or close to a fitting. |
| CPVC | Rigid cream, tan, or light-colored plastic pipe, often marked “CPVC.” It is commonly used for hot and cold potable-water lines. | Check for cracks, brittle or discolored areas, and leaks near fittings. Avoid bending or striking the pipe during inspection. | Confirm that the repair product is expressly compatible with CPVC and the system’s temperature and pressure. Do not assume a sleeve intended for PVC is suitable. | Seek help for brittle, branching, or extensive cracking, or when the damaged area is close to a joint or water-heating equipment. |
| PEX | Flexible plastic tubing, commonly red, blue, or white; may have printed markings and connections secured by approved fittings or clamps. | Inspect for cuts, punctures, kinks, abrasion, or damage at a fitting. Check whether the tubing has been crushed or exposed to heat or sharp edges. | Use a repair method and fittings approved for the specific PEX system and tubing size. A generic rigid-pipe sleeve is generally not a substitute for a proper PEX repair fitting. | Seek help if the tubing is kinked, scorched, extensively damaged, or inaccessible, or if the correct compatible fittings and tools are unavailable. |
| Galvanized steel | Rigid gray or silver-colored metal pipe, often threaded at joints. Older sections may show rust, scaling, or mineral buildup. | Look for rust-through, pitting, scale, bulging, or leaks at threaded joints. Corrosion can affect a wider area than the visible leak. | A sleeve may not seal reliably on heavily scaled or uneven pipe. Check the pipe’s outside condition and confirm the repair product is suitable for the material and service. | Seek a plumber if corrosion is widespread, the pipe is obstructed, a threaded joint is leaking, or more than one leak is present. |
| Cast iron | Heavy, rigid, dark-colored pipe, often used for drains and older waste lines; may have hubbed joints or visible rust. | Assess whether the defect is a small localized hole or a crack, fracture, or deteriorated section. Check nearby pipe for scaling and softness. | Use only a repair clamp or sleeve designed for the pipe’s outside diameter and drainage service. A sleeve is not a dependable fix for a cracked or structurally weakened section. | Seek professional help for a fracture, sagging pipe, active sewage leak, or damage in a concealed or load-bearing section. |
Related Posts
-
How to Repair a Pipe Sleeve in 2026?
-
What Are the Top Types of Pipe Fixers?
-

Mastering Internal Pipe Repair Sleeve Techniques for Optimal Results
-
Top 10 Pipe Fixer Types for Global Buyers?
-
Ultimate Guide to Effective Pipe Sleeve Repair Solutions for Global Procurement
-
What is an internal pipe repair sleeve and how does it work?