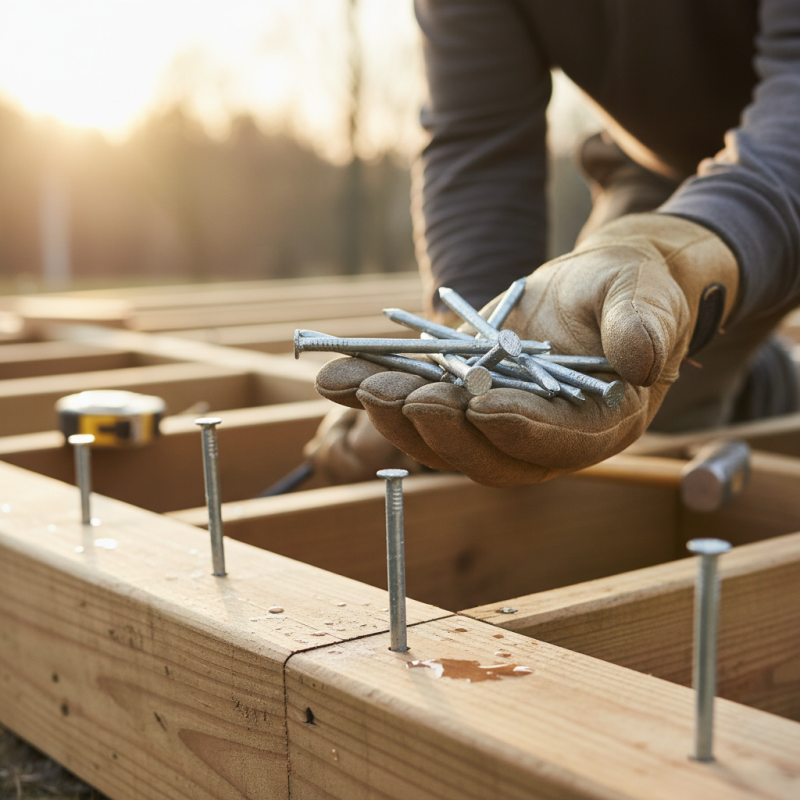
How to Use Galvanized Nails for Home Improvement Projects?
Galvanized nails are vital for various home improvement projects. As expert Mike Johnson, a seasoned contractor, states, “Galvanized nails are your best friend in outdoor applications.” These nails resist rust, making them ideal for decks and fences. When using galvanized nails, it’s important to choose the right size and type for your specific project.
For instance, using short nails in thick wood may lead to weak connections. This could result in structural issues over time. It’s crucial not to rush the process; taking the time to select the correct materials pays off in durability and aesthetics. Additionally, remember that not all galvanized nails are created equal. Some may be coated differently, leading to varying levels of corrosion resistance.
While galvanized nails can enhance your project, they are not perfect. Over time, even galvanized nails can corrode if exposed to moisture frequently. Proper installation and maintenance are essential to maximize their lifespan. With careful thought and planning, you can ensure your home improvement projects stand the test of time.
Understanding Galvanized Nails and Their Benefits for Home Projects
Galvanized nails are a popular choice for various home improvement projects. They are coated with zinc to resist rust and corrosion. This property makes them ideal for use in outdoor projects. A report from the American Wood Council indicates that over 70% of construction professionals prefer galvanized nails for exterior structures.
Using galvanized nails can enhance the longevity of your projects. Their resilience against moisture helps maintain structural integrity over time. However, it is important to consider the type of galvanized coating. Electro-galvanized nails may not be as durable as hot-dipped options. This inconsistency can lead to premature failure in certain applications.
The correct installation of galvanized nails is crucial. Adequate spacing and proper depth ensure that they perform effectively. Some homeowners struggle with achieving the right technique, leading to issues like splitting wood. Each project requires careful planning and attention to detail. Evaluating your needs can help you choose the right type of nail for your specific tasks.
Choosing the Right Type and Size of Galvanized Nails for Your Needs
When embarking on home improvement projects, selecting the right galvanized nails is crucial. These nails vary in type and size for different applications. For instance, if you’re working on outdoor projects, like building a fence, opting for longer nails is essential. A length of at least 2.5 inches provides better grip and support. If you are fastening thin materials, such as trim or siding, shorter nails around 1.5 inches may suffice.
Choosing the right gauge is equally important. A heavier gauge offers more strength but can be more difficult to drive in. Lighter gauges are easier to handle but might not hold as well under stress. When unsure, consider the material in use. Wood projects often benefit from thicker nails, while lighter jobs may require a thinner profile.
Not everyone considers the finish as a critical factor. However, the finish on a galvanized nail can affect its performance. A smooth finish works well in softwoods, allowing for easier driving. But for tougher materials, a ring-shank option provides enhanced holding power. Don't rush through the selection. Take time to assess your specific needs. You might find that the wrong choice leads to more repairs down the road.
Proper Techniques for Installing Galvanized Nails in Various Materials
When working with galvanized nails, understanding proper techniques is essential for successful home improvement projects. These nails resist rust and corrosion, making them suitable for outdoor applications. However, the installation process varies depending on the material.
When nailing into wood, use a hammer for a clean drive. Maintain a 45-degree angle to avoid splitting the wood. Consider pre-drilling for tough hardwoods. For metal surfaces, ensure proper penetration. A nail gun can provide precision but must be adjusted for the nail size.
Tip: Always wear safety goggles when nailing. Safety should be a priority.
Galvanized nails can create unintentional issues in certain materials. Moisture can cause the nails to corrode faster when in contact with untreated wood. A report from the National Nail Association suggests that moisture management is critical. For concrete, use masonry nails or anchors instead.
Tip: Test a small section before proceeding with extensive installations. This ensures that your chosen method works effectively.
How to Use Galvanized Nails for Home Improvement Projects?
| Material Type | Nail Size (inches) | Recommended Technique | Spacing (inches) | Purpose |
| Wood | 2 | Pre-drill for larger pieces | 6 | Framing |
| Plywood | 1.5 | Use a hammer gently | 4 | Sheathing |
| Concrete | 3 | Use a hammer and masonry drill | 12 | Anchoring |
| Metal | 1 | Specialized nail gun | 3 | Fabrication |
| Roofing | 1.25 | Use hammer with circular motion | 8 | Roof installation |
Common Mistakes to Avoid When Using Galvanized Nails
When working with galvanized nails, common mistakes can lead to frustrating outcomes. One frequent error is using the wrong size of nails for your project. Choosing nails that are too short may not provide enough hold. Conversely, overly long nails can split the wood. Pick the right length based on the thickness of your materials.
Properly preparing your materials is crucial. Many overlook this, leading to misalignment. Ensure surfaces are clean and dry. Damp wood can cause corrosion, which diminishes the nails' effectiveness. Misplaced nails can weaken joints and ruin your work.
Tips: Always test a few nails on scrap wood before your main project. This helps gauge their performance. Be mindful of using a hammer versus a nail gun; the wrong tool can cause damage. Keep your work area organized to avoid distractions. An organized space leads to better results. Remember, practice makes perfect. Learning from mistakes is part of the process.
Maintenance and Care for Projects Using Galvanized Nails
Galvanized nails are popular for their rust-resistant properties. However, proper maintenance is essential for longevity. According to the American Institute of Steel Construction, these nails can last significantly longer than untreated alternatives, especially in humid environments. Regular checks are crucial. Over time, the protective coating can wear off or become damaged, exposing the metal beneath.
Avoid placing galvanized nails in contact with untreated wood. This can lead to corrosion. If you observe any discoloration, it's time to replace them. Ensure that the nails are driven at the right angle and depth. Improper installation can compromise the integrity of the project.
When caring for projects using galvanized nails, consider environmental factors. Strong exposure to moisture or salt can accelerate rust. Using appropriate sealants may help. On average, projects using galvanized nails have a 40% lower failure rate compared to those using non-galvanized options. However, no project is without flaws. Inspect surfaces regularly and address any signs of deterioration promptly.