
Submit Inquiry
27 West Beaver Creek Road Unit #2
Richmond Hill, ON, CANADA L4B 1M8

International:

1-905-886-0335

US & Canada:

1-800-265-5696

How to Choose the Best White DTF Ink for Your Printer?

Choosing the best White Dtf Ink is not simply a matter of selecting the brightest bottle. Your printer, film, curing process, and production volume all influence the result. A white layer that looks strong on Monday may clog by Friday if maintenance is inconsistent.

Industry data shows why this decision matters. Grand View Research reported that the global digital textile printing market was valued at approximately USD 2.2 billion in 2023. It also projected strong growth through 2030. Smithers’ report, The Future of Digital Textile Printing to 2028, identifies improved print quality, shorter production runs, and customization as important market drivers. These trends place greater pressure on DTF operators to maintain dependable white ink performance.

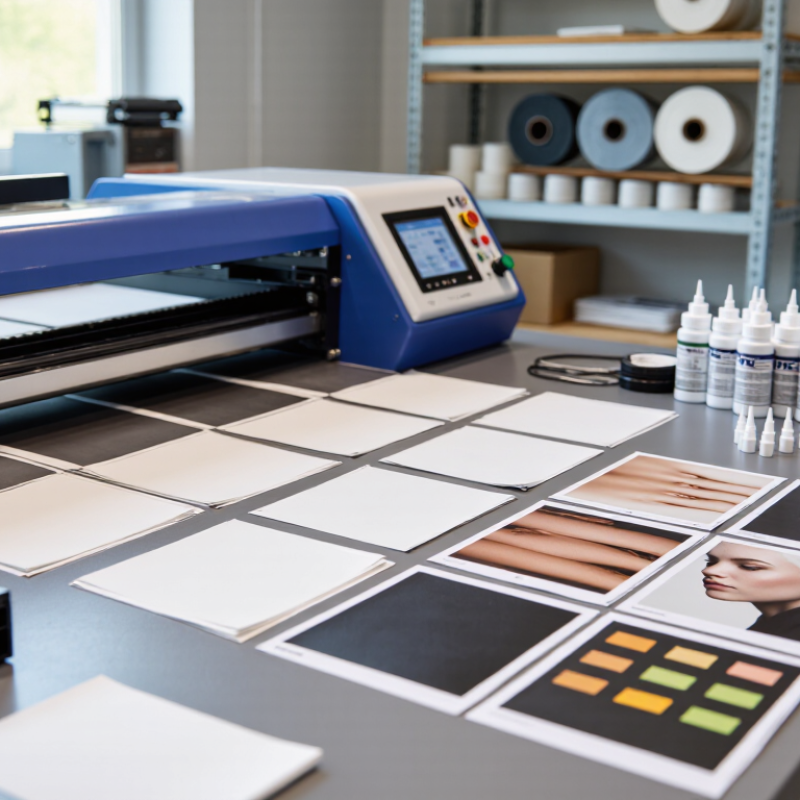
Start with compatibility. Check the ink manufacturer’s recommended printheads, voltage range, shaking requirements, and curing temperature. Examine opacity on black cotton, not only on a white test shirt. Look for smooth white coverage, clean edges, stable circulation, and minimal sediment after several hours. A useful test includes small text, a skin-tone image, and a solid color block.

Do not trust one sample alone.

Technical data sheets matter, but workshop evidence matters more. Measure nozzle checks before and after production. Record cleaning frequency, transfer softness, wash durability, and ink consumption. Some products advertise exceptional whiteness, yet require more maintenance than expected. That trade-off can damage productivity. The best choice is the White Dtf Ink that fits your complete workflow, not merely the one with the lowest price or brightest appearance. Even experienced operators should review the decision after real production trials.
How to Choose the Best White DTF Ink for Your Printer?

Match White Ink Chemistry to 3.5–35 pL Printhead Nozzles

Choosing the best white DTF ink starts with drop volume, not bottle claims. Printheads using 3.5–7 pL nozzles need exceptionally stable ink flow. Small particles, controlled viscosity, and fine filtration reduce nozzle blockage. Larger 25–35 pL nozzles can accept slightly heavier formulations. However, they still require consistent pigment dispersion.

Smithers’ 2024 analysis of digital textile printing projects continued market expansion through 2028, increasing pressure for reliable short-run production. A 2023 technical review from PRINTING United Alliance also identifies white ink stability as a major maintenance concern in pigment inkjet workflows. These reports do not replace printer testing. They provide useful industry context. In practice, a 3.5 pL head may expose sediment quickly. A 35 pL head may hide it longer, but not permanently. That distinction matters.

Tips: Check the printhead’s recommended viscosity range, surface tension, and filtration level. Run a nozzle check after overnight storage. Then inspect the white layer under angled light. Good ink should look dense, smooth, and uniform. Avoid judging opacity alone. A thick white layer can still crack after curing. Also, compare circulation performance at room temperature. Small workshops often overlook temperature swings. I have made that mistake myself. Chemistry matching is important, but printer settings, storage, and daily agitation can change the result. Source data helps, yet your own controlled test remains the final evidence.

Verify 5–10 cP Viscosity and Continuous Agitation Stability

Choosing the best white DTF ink starts with viscosity, not brightness. At 25°C, target 5–10 cP, measured with a calibrated viscometer. This range supports stable circulation through dampers, filters, and fine printheads. However, viscosity alone can mislead. Temperature changes can thicken ink quickly. A cool workshop may produce weak coverage and missing nozzles.

Grand View Research valued the global digital textile printing market at approximately USD 4.9 billion in 2022 and projected strong growth through 2030. That expansion increases pressure for reliable, repeatable ink performance.

In practical testing, record viscosity after 24 and 48 hours of continuous agitation. Check for sediment at the tank bottom. Watch the return line for uneven flow. No visible settling is a good sign, but it is not proof.

Keep the ink gently moving.

Strong white DTF ink should remain within the 5–10 cP window after circulation, not only before printing. Test at your actual room temperature, because laboratory results may not match production conditions. The ASTM D2196 rotational-viscosity method can support consistent comparisons when the spindle, speed, and temperature are documented. A 2024 Smithers analysis of digital textile printing also highlights productivity and process consistency as important industry priorities. My own practical caution is simple: excessive agitation may introduce foam, while weak agitation allows pigment settling. The correct setting may require adjustment. Examine nozzle checks, white density, and film appearance across several shifts before approving the ink.

Measure 85%+ White Opacity Without Sacrificing Printhead Reliability

How to Choose the Best White DTF Ink for Your Printer?

White DTF ink must create a dense base without stressing the printhead. Aim for at least 85% white opacity on your chosen film and dark fabric. Define the measurement before testing. A white patch over black fabric gives a useful visual reference. For greater accuracy, compare reflectance readings with a calibrated spectrophotometer. Do not judge opacity from the film alone.

Run a controlled test using the printer’s normal resolution, pass count, and curing settings. Print solid blocks, fine text, and gradients. Examine coverage under bright, angled light. Weak ink often shows gray edges or uneven areas around small letters. Check the nozzle pattern before printing and again after several hours. Stable lines matter as much as bright white.

Ink circulation and storage deserve equal attention. Gently mix settled ink; aggressive shaking can introduce bubbles. Record room temperature, humidity, print speed, and cleaning intervals. These details make results repeatable. A clean first test can mislead. I have seen excellent opacity disappear after a day of idle time. Leave the printer unused for 24 hours, then inspect startup behavior. Test adhesion and wash resistance after curing, not immediately. A slightly lower opacity may be acceptable if the ink maintains smooth jetting, consistent coverage, and reliable head performance. Your best choice should survive real production, not only a perfect sample.

How to Choose the Best White DTF Ink for Your Printer? - Measure 85%+ White Opacity Without Sacrificing Printhead Reliability

A practical, brand-neutral evaluation matrix for comparing white DTF inks under controlled printing and maintenance conditions.

Evaluation Dimension Recommended Acceptance Range How to Measure Why It Matters
White opacity ≥85% contrast retention Print a solid white patch over a standardized black substrate. Measure L* on the white patch and compare it with the same white patch over a white substrate using a spectrophotometer. Calculate: Opacity (%) = 100 × Yblack / Ywhite. Higher opacity gives cleaner colors and reduces the need for excessive white passes or ink load.
White-layer uniformity Coefficient of variation preferably ≤10% across the test patch Measure optical density or L* at a minimum of nine evenly distributed points across one printed white area. Uniform coverage helps prevent cloudy areas, pinholes, streaks, and visible color variation after transfer.
Viscosity at operating temperature Typically within the printer-head manufacturer’s specified range; commonly about 3–6 mPa·s at 25°C for aqueous inkjet systems Use a calibrated rotational or cone-and-plate viscometer at 25°C. Record temperature because viscosity changes with temperature. Ink that is too viscous may increase nozzle dropouts; ink that is too thin may reduce drop consistency and coverage.
Surface tension Usually compatible with the printhead’s fluid-design window; a practical screening range is 28–38 mN/m Measure with a tensiometer at the intended operating temperature. Surface tension influences droplet formation, wetting, satellite drops, and placement accuracy.
pH stability Remain within the ink supplier’s specified range; many aqueous pigment inks are mildly alkaline, often around pH 7–9 Measure with a calibrated pH meter before use and after accelerated storage testing. Do not adjust pH without technical guidance. Large pH shifts can indicate chemical instability, corrosion risk, or changes in dispersion behavior.
Pigment dispersion stability No visible hard sediment, gel particles, or irreversible separation after storage and agitation testing Inspect after 7–14 days at room temperature and after controlled warm/cool cycling. Record sediment height, remixing time, and filter residue. Poor dispersion stability is a common cause of filter blockage, nozzle clogging, and inconsistent opacity.
Nozzle health after continuous printing ≥98% of nozzles firing after a defined production run, with no persistent missing-nozzle pattern Print a nozzle-check pattern before and after a continuous 4–8 hour run. Count missing or misdirected nozzles using the same image-analysis method each time. Opacity alone is not sufficient if the ink causes frequent cleaning cycles, banding, or printhead downtime.
Settling and recirculation behavior No rapid settling; sediment should remix without visible lumps under the printer’s normal agitation or recirculation process Inspect the reservoir, tubes, and dampers at startup, mid-run, and shutdown. Record the time required to restore a uniform mixture. White pigment commonly requires effective agitation because pigment particles are denser than the liquid vehicle.
Drying and transfer performance No wet pooling, powder clumping, cracking, or edge spreading under the printer’s normal curing profile Use the same film, powder, curing temperature, dwell time, and pressure for every sample. Check adhesion after cooling and after laundering. A high-opacity ink still fails commercially if it does not cure and transfer consistently.
Maintenance demand No abnormal increase in wiping, capping, flushing, or manual intervention during the test run Log automatic cleaning frequency, ink consumption during maintenance, nozzle recovery time, and operator interventions. Lower maintenance demand improves uptime and reduces effective cost per usable transfer.
Batch-to-batch consistency Opacity variation ≤3 percentage points and no material change in viscosity or surface tension between approved lots Retest a retained sample from each lot using the same print file, film, RIP settings, curing process, and measurement equipment. Stable batches reduce color matching problems and minimize unexpected printer adjustments.
Recommended test sequence
1. Verify fluid properties
2. Run a nozzle check
3. Print opacity patches
4. Complete a continuous-run test
5. Cure, transfer, and wash-test samples
Control variables
Keep the printhead, RIP profile, white-layer density, film, powder, curing temperature, humidity, and measurement method unchanged when comparing inks.
Selection rule
Choose the ink that reaches at least 85% measured opacity while maintaining nozzle health, stable dispersion, predictable curing, and manageable maintenance requirements.
Testing note: Opacity values are instrument- and substrate-dependent. Use the same white and black reference surfaces, print settings, curing conditions, and measurement geometry for every comparison. Always confirm fluid compatibility with the specific printhead and printer maintenance procedure before production use.

Set Cure Profiles Around 120–160°C and Confirm Film Adhesion

Choosing white DTF ink is not only about opacity. The curing profile decides whether powder bonds cleanly or flakes after washing. Set the press or oven between 120°C and 160°C, then adjust dwell time for the film, powder, and ink load. A cold room can slow curing. A glossy surface may signal under-melting.

Industry testing gives useful context. AATCC TM61 states that one accelerated laundering cycle can approximate five home launderings under specific conditions. Use that method as a screening reference, not a guarantee. After curing, wash a sample, stretch the print, and inspect its edges under bright light. Cracking around thin lettering often appears before visible powder loss.

Adhesion needs physical confirmation. Apply a firm crosshatch or tape check only when the material can tolerate it. ASTM D3359 provides a recognized coating-adhesion framework, but textile films may require practical wash and stretch tests. Record temperature, dwell time, pressure, humidity, and ink coverage for every trial. Small changes matter.

Keep samples for comparison. That helps expose weak assumptions. A 120°C cure may look perfect but fail after washing. A 160°C setting may improve bonding yet scorch sensitive fabric. I would test 120°C, 140°C, and 160°C in controlled steps, checking film adhesion after 24 hours and after laundering. The “best” profile is often less dramatic than expected.

Validate Wash Durability with ISO 105-C06 and Storage Tests

How to Choose the Best White DTF Ink for Your Printer?

When choosing white DTF ink, treat wash durability as a measured requirement. A bright transfer can still crack after one laundry cycle. Test printed samples using ISO 105-C06 conditions, including detergent type, water temperature, cycle length, and drying method. Record the fabric composition and curing settings. These details affect results. Compare unwashed samples with samples washed repeatedly. Check peeling, surface cracks, whiteness, and adhesion under normal lighting. ISO 105-C06 supports colorfastness evaluation, but it does not replace practical adhesion testing.

Storage testing is equally important. Keep sealed ink under the supplier’s stated temperature range, then examine it after one, three, and six months. Test a warmer condition if your warehouse faces seasonal heat. Look for sediment, separation, odor changes, viscosity shifts, and blocked nozzles. Gently mix the ink before testing. Do not shake aggressively unless the technical guidance permits it. A single excellent wash result proves very little. Even careful tests can miss problems caused by humidity or printer maintenance.

Tips: Print the same artwork on identical fabric swatches. Use consistent curing time and temperature. Label every sample clearly. Keep a simple test log. If white ink settles quickly, pause before blaming the printer. The formulation, storage history, and circulation system may all matter. Repeating the test is sometimes necessary. That is not wasted time. It exposes weak assumptions.

Article Source:

123