How to Choose the Right Curb Paver for Your Project
Choosing a Curb Paver is not just a question of color. The right unit must suit the edge’s job, the ground beneath it, and the way people will use the space. A garden path may need a neat, low-profile border. A driveway edge faces heavier loads, turning tires, and water moving across the surface. Small differences matter. A paver that looks sturdy in a showroom can shift if its base is poorly prepared.
This introduction uses an illustrative expert voice, not a verified quotation: paving specialist Daniel Reed might say, “Choose the curb paver for the pressure it must handle, not just the pattern you like.” Treat that as a practical principle, not a sourced statement. In real projects, confirm product ratings and installation details with the manufacturer or a qualified installer. Check the soil, drainage, freeze-thaw exposure, and nearby paving before settling on a material. Measure the curve, too. A rigid unit may fight a tight bend.
The sections that follow compare concrete, natural stone, and other common options; explain size, shape, finish, and load considerations; and identify installation details that affect long-term stability. They also cover cost and maintenance, because the cheapest choice can become expensive after settling or repair. No curb paver is perfect for every site. A little uncertainty is useful: when site conditions are unclear, pause and get them assessed rather than guessing.
Identify the Curb’s Function and Project Requirements
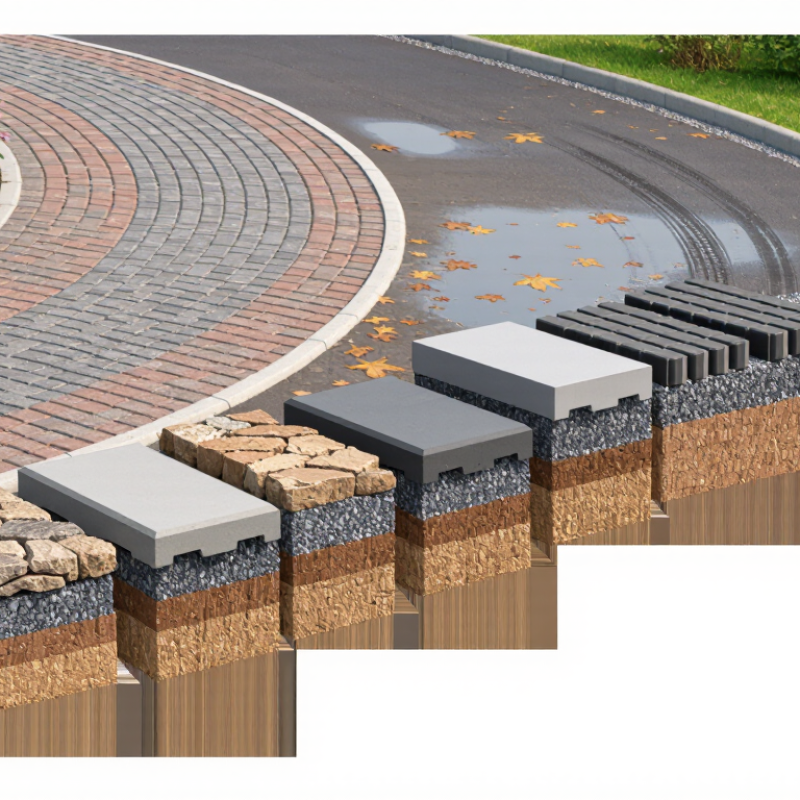
Identify what the curb must do before choosing its paver. Is it holding an interlocking surface in place, directing runoff, separating a walkway from vehicle traffic, or providing a clear edge for maintenance crews? These roles need different details. A restraint curb needs a stable base and secure connections; a drainage curb needs planned slopes and outlets. Check expected wheel loads, soil strength, freeze-thaw exposure, and the transition to nearby paving. Small details matter.
For permeable paving, confirm that water can enter the system and has somewhere to go. The Concrete Masonry & Hardscapes Association’s Tech Spec 18 cites 100 inches per hour as a field infiltration benchmark for permeable interlocking concrete pavement. That is a surface test, not a promise of long-term drainage. Soil, sediment, and poor maintenance can change performance. A site-specific test is wiser than assuming the numbers will hold.
Tips: Mark runoff paths with a hose or level before setting the curb line. Check delivery access and turning movements, too; a curb that works on paper may be struck by a truck in daily use. Specify paver dimensions, bedding, joint treatment, and edge restraint together. I would revisit the detail after a trial section. It is easy to overlook how one awkward corner can trap water or complicate repairs.
Compare Curb Paver Materials, Sizes, and Profiles
Concrete, clay, and natural stone each suit different curb conditions. Concrete offers consistent dimensions and many finishes; clay brings rich color but may chip at exposed edges. Stone varies naturally, so sample pieces before ordering. Match unit length and height to the curve: shorter units generally follow tighter radii with fewer awkward cuts. A straight profile looks crisp beside modern paving, while a rounded edge feels softer and is easier to approach with a wheel or shovel.
Profile affects both appearance and performance. Check whether the curb needs a flush transition, a raised edge, or a channel for runoff. For adjacent concrete paving units, ASTM C936/C936M sets a minimum average compressive strength of 8,000 psi and limits water absorption. That is useful product data, not a promise that every curb installation will perform well; bedding, drainage, and restraint matter too. A tidy plan can still mislead if the site has uneven ground. Measure it.
Tips: Lay out a short dry run before excavation. Compare the actual curb height with nearby paving, then test a sample curve using the chosen unit size. Ask suppliers for test documentation and installation guidance from the Concrete Masonry & Hardscapes Association (CMHA). Record the profile and dimensions in the order; small mismatches become obvious at corners.
How to Choose the Right Curb Paver for Your Project - Compare Curb Paver Materials, Sizes, and Profiles
| Material | Typical Unit Sizes | Common Profiles | Key Advantages | Things to Consider | Often Suited To |
| Precast concrete | Common small edging units are approximately 4–6 in. wide, 8–12 in. long, and 3–6 in. deep; dimensions vary by product. | Straight, beveled, bullnose, and matching radius units may be available. | Available in many shapes and finishes; modular units are generally straightforward to install and replace. | Color and finish can vary between production batches. Confirm the unit’s intended use and installation requirements. | Garden borders, walkways, patios, and landscape edging. |
| Granite and other natural stone | Highly variable; curb blocks are commonly supplied in longer lengths, with width and depth selected for the project and local availability. | Sawn, split-face, chamfered, or rounded-edge profiles; curved sections may require custom cutting. | Distinctive natural appearance and substantial mass; some stone types are well suited to long service life. | Often heavier and more costly to handle and install. Stone properties, finish, and availability differ by source. | Formal landscapes, durable edging, and projects where natural stone is desired. |
| Clay paving brick | A common modular paver size is about 4 × 8 in., with thickness often around 2¼ in.; actual dimensions vary by product and market. | Rectangular units, often laid in soldier or other border patterns; bullnose or special edging units may be available. | Traditional appearance and a broad range of colors; individual units can be replaced. | A standard paving brick is not necessarily designed to function as a tall or load-bearing curb. Check its intended application and installation details. | Decorative borders beside patios, paths, and other pedestrian areas. |
| Concrete paving units | Common modular paver sizes include approximately 4 × 8 in. and 6 × 9 in.; thickness commonly ranges from about 2⅜ to 3⅛ in., depending on application and product. | Rectangular, chamfered-edge, and specialty edge units; curved borders are typically formed with smaller units or compatible radius pieces. | Consistent modular sizing and many color and shape options; can coordinate with an adjacent paved surface. | Pavers alone may not restrain an adjacent pavement unless installed with suitable edge restraint and base preparation. | Borders that coordinate with concrete paver patios, paths, and driveways. |
Note: Sizes above are typical examples, not universal standards. Product dimensions, profile availability, and suitability vary by manufacturer, region, intended loading, and installation method. Check local requirements and the product’s technical information before selecting a curb paver.
Evaluate Site Conditions and Installation Methods
A curb paver that looks suitable in a sample may behave differently once it meets the site. Check what the edge must contain: foot traffic, parked vehicles, lawn equipment, or runoff. Note whether the ground stays soft after rain. A simple hose test can reveal where water collects. Small puddles matter. They may point to poor drainage or a low spot that needs correction before installation.
Soil and climate also shape the choice. Clay can hold water and shift as it freezes, while loose fill may settle under repeated loads. On a sloped drive, a stable base and secure edge restraint help keep pavers from creeping downhill. Measure the planned excavation, too. If the base cannot be compacted evenly, even durable pavers may tilt or open gaps. This detail is easy to underestimate.
Installation should match the layout and the existing surface. Straight runs are usually simpler to set than tight curves, which may require careful cuts and extra fitting time. Check how the pavers will meet asphalt, concrete, or a garden bed, and plan a firm transition. Follow the paver maker’s installation guidance, including base depth and joint material, because requirements vary by product and site. A dry layout first can expose awkward cuts. It may feel fussy, but changing the pattern before setting the base is often easier than repairing a wandering edge later.
How to Choose the Right Curb Paver for Your Project
Evaluate traffic and ground conditions before choosing a curb paver and installation method.
Typical planning benchmarks for compacted aggregate base are about 4 in for pedestrian areas, 6 in for residential driveways, and 10 in for frequent or heavier vehicle traffic. These are representative values, not universal specifications. Weak or wet soils, freeze-thaw conditions, drainage, and local requirements may call for a deeper base and a site-specific design.
Balance Durability, Maintenance, Appearance, and Cost
A curb paver must handle more than foot traffic. Driveway edges face tire pressure, water, and winter freeze-thaw cycles. For concrete units, ASTM C936/C936M sets minimum average compressive strength at 8,000 psi and maximum average water absorption at 5%. These benchmarks help screen products, but proper base preparation and installation matter just as much. A strong paver on a poorly compacted base can still shift.
Maintenance affects long-term cost. Concrete and clay pavers are durable, but joints may need fresh sand after heavy rain or repeated vehicle turns. Permeable options can reduce surface runoff, yet CMHA guidance notes that their open joints need periodic vacuum cleaning to limit clogging. Appearance matters, too: lighter colors can show tire marks, while textured surfaces may hide them but collect grit. Ask for samples and view them beside your driveway in daylight. Budget for the base, edging, and labor—not just the unit price.
Tips: Match paver thickness and installation to expected vehicle loads. Check ASTM test data, drainage needs, and local repair access before buying. I’d still inspect a small installed section first; color and texture can look different across a full curb.
Verify Specifications, Compliance, and Availability
How to Choose the Right Curb Paver for Your Project
Verify Specifications, Compliance, and Availability
Before choosing a curb paver, check its dimensions, thickness, edge profile, and material. Small variations can affect alignment, joint width, and the finished curb height. Confirm whether measurements are nominal or actual, and ask what tolerances are permitted. Details matter. A sample beside a tape measure can reveal issues that a product image will not.
Review the project specifications and applicable local requirements before ordering. Confirm the required load capacity, slip resistance, durability, and drainage details for the installation site. Ask for current technical data and test documentation, and check that the stated methods match the project’s requirements. Do not assume a general compliance claim covers every application. Requirements differ. If a specification is unclear, get written clarification from the designer or relevant project professional before approving a substitute.
Availability needs the same attention as performance. Verify quantities, lead times, delivery arrangements, and whether replacement units can be supplied later. Color and texture may vary between production batches, so request samples from the intended lot when possible. Stock can shift. It is tempting to approve a paver based on appearance and revisit logistics later; that can leave an otherwise sound plan waiting on materials. Check these details before setting the installation schedule.